Gunpla are designed to be more accessible than regular glue-together models. Anyone who can follow rudimentary instructions can pick up one of Bandai’s Gundam model kits and build their own miniature real robot in a matter of hours. Entry-grade models even tout the fact that you don’t need nippers to do so. However, getting the best Gunpla tools will make your experience much more enjoyable and significantly increase the quality of your finished build.
What tools do I need to build Gunpla?
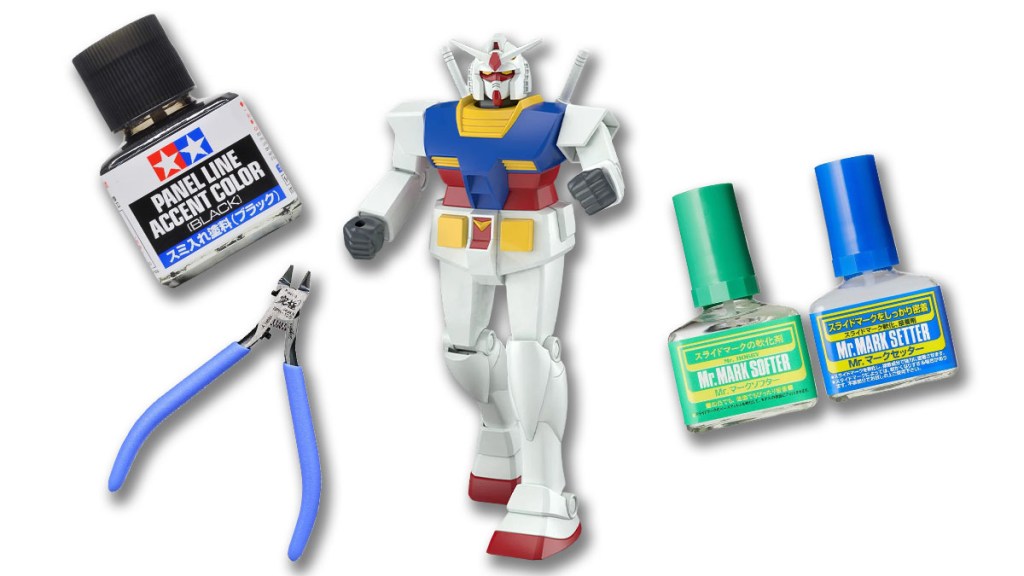
The tools you use when building Gundam models have a massive effect on how your model will turn out. Using low-quality tools will make a build take longer, and you’ll end up making more mistakes. There are plenty of people who will disparage spending more than the minimum on the basics, but that’s just wrong. Even the top-of-the-line Gunpla tools aren’t that expensive, especially when you compare them to the price of the models. So, save your plastic investment by purchasing the products below.
Nippers
The absolute minimum Gunpla building tools you need are a set of nippers. To assemble the parts, you need to be able to cut them out. There are tons of different nippers available, but we recommend the following:
Precision Cuts: GodHand Ultimate Nipper 5.0 (GH-SPN-120)
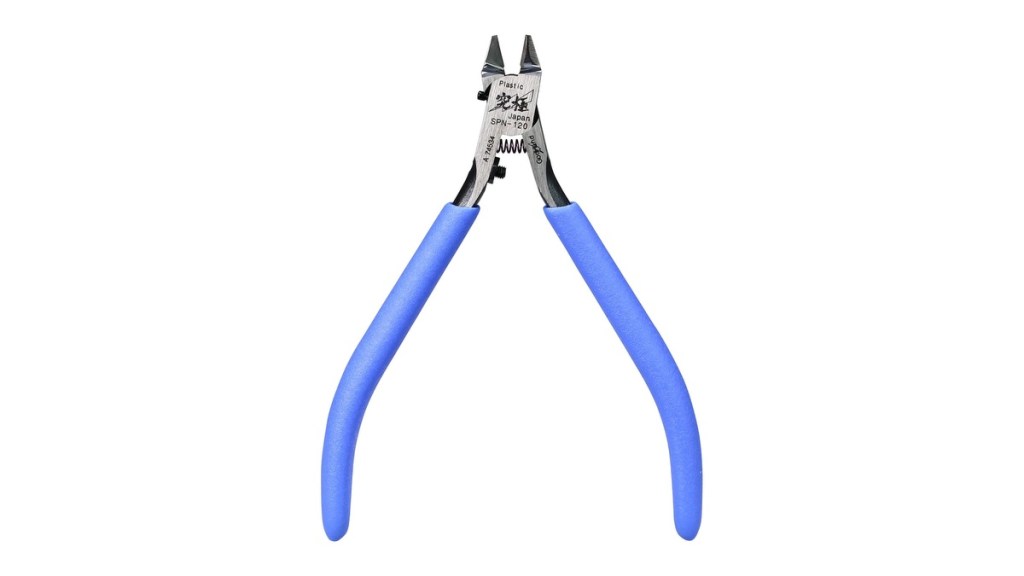
These blue-handled nippers are thin and designed to quickly cut through sprues and nubs without stressing the plastic. Since they’re made for precision work, these are the ones you’ll want to use for your second cut. Once you learn how to use them, you can get them flush against your piece and make cuts that require zero follow-up sanding. However, they are more expensive than many similar products, and their thinness makes them fragile. You don’t want to use these to cut thicker sprues or cut with the tips, or you’ll risk breaking them.
Rough Cuts: GodHand Blade One Nipper (GH-PN-120)
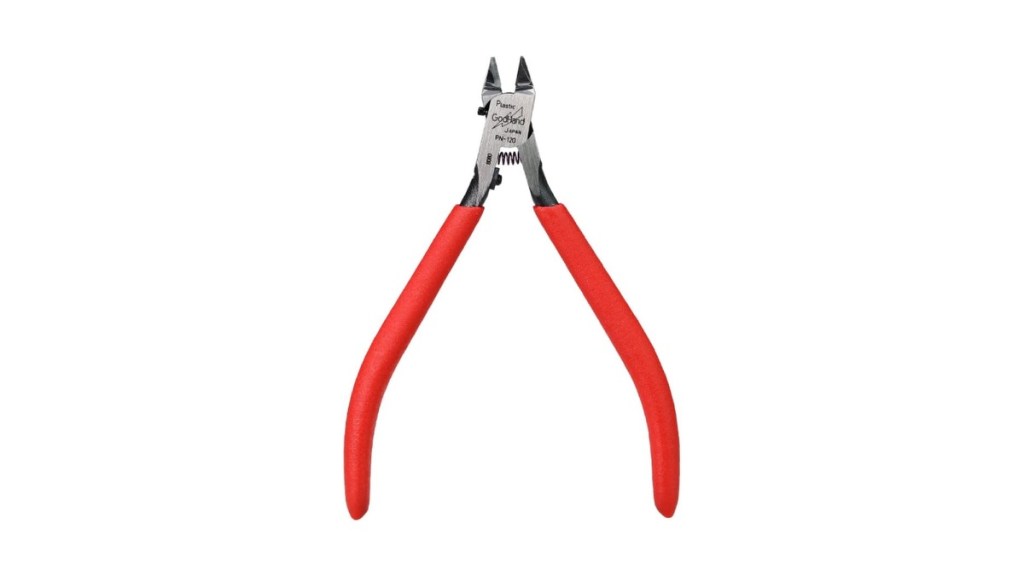
The red-handled GodHands are a bit more heavy-duty, but still retain excellent cutting quality. These are tough enough to cut farther up the sprue and sharp enough to go straight through, rather than twisting the plastic. For rough cuts, you could get away with a cheaper pair of nippers from DSIPAE or elsewhere, but these are worth the extra money.
Panel Liner
It doesn’t matter how detailed a model is if you can’t see any of it. All those little lines and curves blend into the rest of the plastic at a distance. However, there’s an easy way to make them pop: use a panel liner.
There are several kinds of panel liner available, and you can even just use a marker or pencil. However, most builders end up using one of the three types below.
Fine-tipped Markers

The fine-tipped GSI Creos Gundam Markers are probably the most common panel lining option. You draw over the panel lines with them, then wipe off the excess. The most significant issue with these is that the process gets tedious. Some kits have a ton of lines to fill, and drawing over every one of them can take a while.
Pour-type Markers

These markers contain a very thin alcohol-based ink that uses capillary action to fill in panel lines. Just place the tip in a line and let physics do the work for you. However, there is a big disadvantage to these. They’re only meant for bare plastic and will cause most paints to run.
Tamiya Panel Line Accent Color
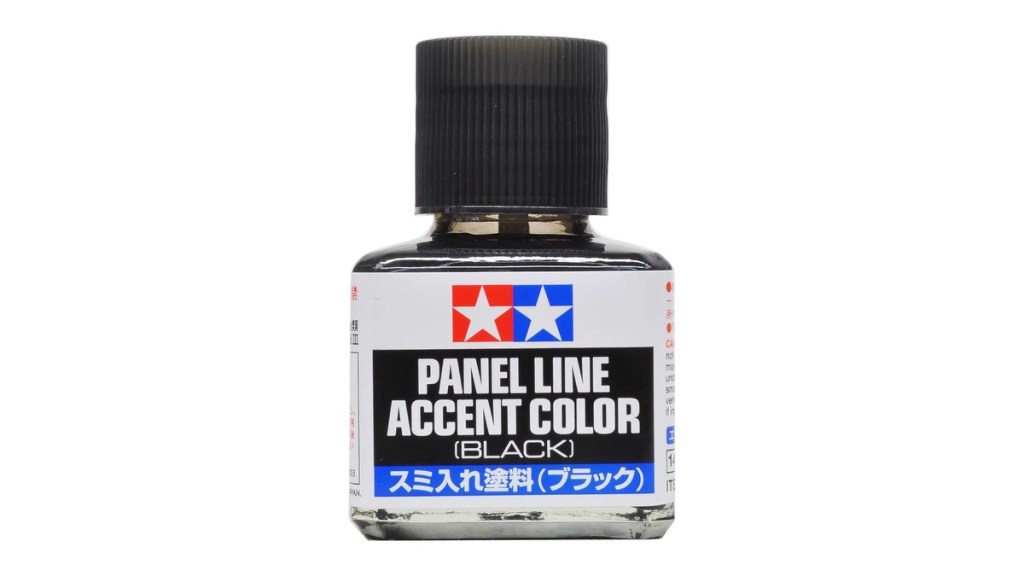
If you decide to paint your kit, this is the panel liner to use. It’s a very thin enamel paint that uses capillary action like pour-type markers do. However, there are some things to keep in mind when using this product. If you don’t plan to paint your model, you must use this panel liner while the parts are still on the sprues. If this stuff pools up somewhere, it can eat through plastic, so making sure it dries thoroughly is key to preventing issues. If you plan to panel line a painted kit with Tamiya accent color, you must apply a protective gloss coat over the paint first. Otherwise, the thinner inside will dissolve your paint.
Glass File
For decades, modelers primarily used sandpaper and metal files to remove nubs. Both these methods have their drawbacks and are time-consuming. Fortunately, these days you can use a glass file, a one-size-fits-all tool that efficiently takes care of nubs without being too hard on your plastic. I highly recommend Gunprimer’s Gate Remover Set, which includes a Raser glass file. The cutting surface on most other glass files is arranged in strips, which clog easily and cause burrs. The Raser’s surface is covered in circular nubs that turn sanded plastic into a powder that brushes away easily. The set also includes a Balancer, which helps restore plastic to a uniform finish without requiring a full sanding. The Raser is almost as big a game changer as a good set of nippers, and it’s worth every penny.
Waterslides
Most Gundam kits come with sticker decals. These are almost uniformly terrible. They have a large border around them, they’re tough to stick to, and they’ll randomly fall off over time. Even on cheaper kits, you’re better off investing the extra $5 or so on Delpi or G-Rework waterslides. They can be intimidating to use at first, but they’re very forgiving compared to stickers or dry-transfer (my dreaded nemesis).
Waterslide Tray
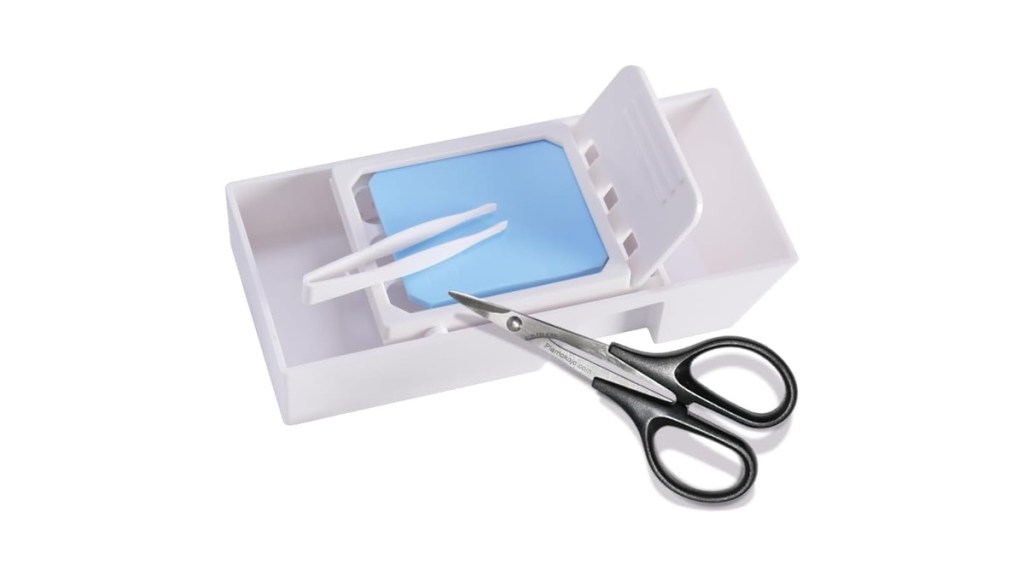
The biggest problem with waterslides is that they’re incredibly tedious to use. Cutting out one, wetting it, and waiting a minute or so for it to soften enough to apply gets old when there can be 50 or more in some kits. Fortunately, these trays allow you to dip multiple waterslides at once, and the sponge they rest on keeps them moist and ready to go without soaking away all the glue. So, instead of doing them one at a time, you can cut out a whole section worth and go wild.
Mark Setter and Mark Softer
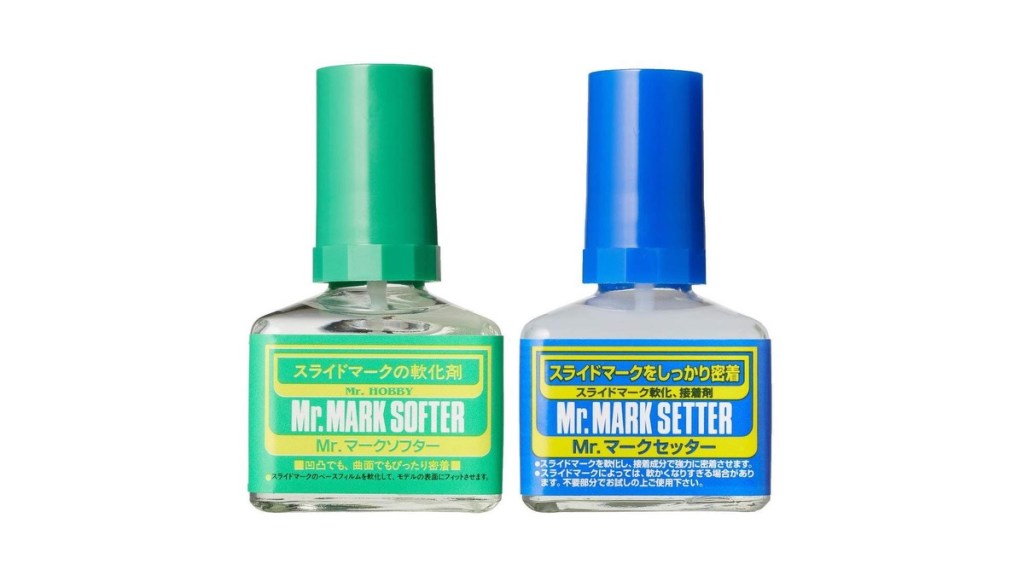
You can raw dog waterslides by get slopping some water on them and they’ll probably stick. However, they’ll probably silver after drying and then over time peel, flake, or fall off (especially if they’re straight from Bandai). Fortunately, this is incredibly easy to prevent by using a combo of Mr. Mark Setter and Mr. Mark Softer (or Micro Set and Micro Sol).
Mr. Mark Setter (Micro Set) enhances the adhesiveness of decals. Rub it on the area you want to place the decal, then apply it. It’ll help the waterslide adhere evenly and prevent peeling. Then, once it’s dry, you apply Mr. Mark Softer (Micro Sol), which will soften the decal, allowing it to adhere to curved pieces or meld into cracks, and give it a painted appearance.
These two products are a must-have if you’re using waterslides. They’re easy to use once you get the hang of them and give excellent results.
Topcoat
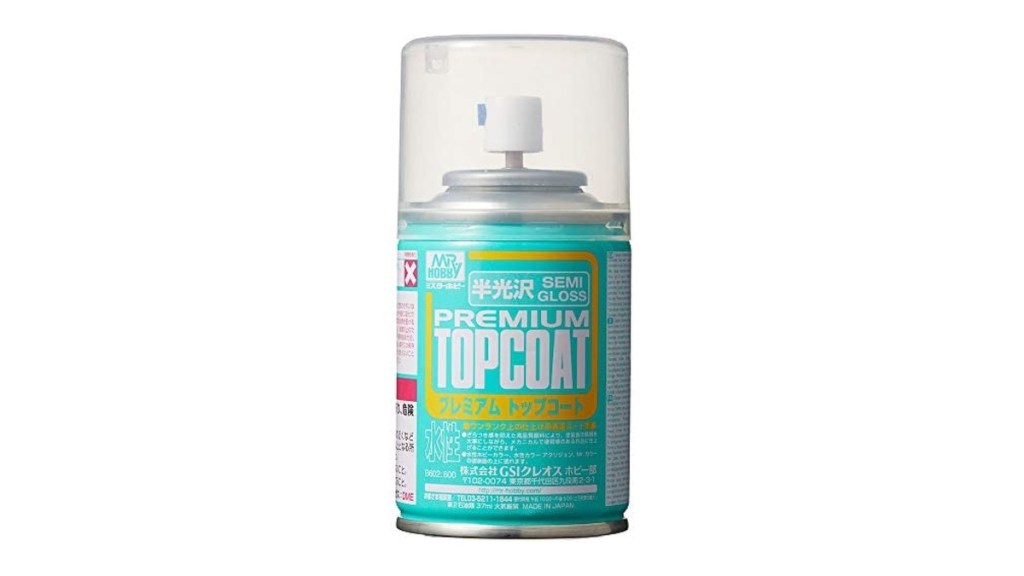
So you’ve finished your model, put on the decals, but it’s still missing something. The top coat performs several tasks for a builder. Firstly, it seals in decals and stickers. Even after applying Mr. Mark Setter and Softer, waterslides are still vulnerable to flaking and peeling if something rubs against them. Top coat provides protection that’ll prevent that damage.
A top coat also helps give a uniform look to a Gunpla’s surface and covers minor blemishes. Furthermore, it removes the plasticky sheen that bare models have, making them look closer to paint or metal. However, it does have a few drawbacks. Many types of topcoat are toxic. If using the spray-can type, even the water-based ones are dangerous to inhale due to the propellant. Unfortunately, it’s tough to recommend a single type because your choice depends on whether you paint a model, which panel liner you use, and so on. We suggest doing extensive research before settling on which one is best for you.


